
Designing your knife
There's a lot to think about when you commission a knife. On this page I'll take you through the construction styles, the steels I use and the terms I'll use when we talk it through, so you know what you're choosing before we start.
Construction
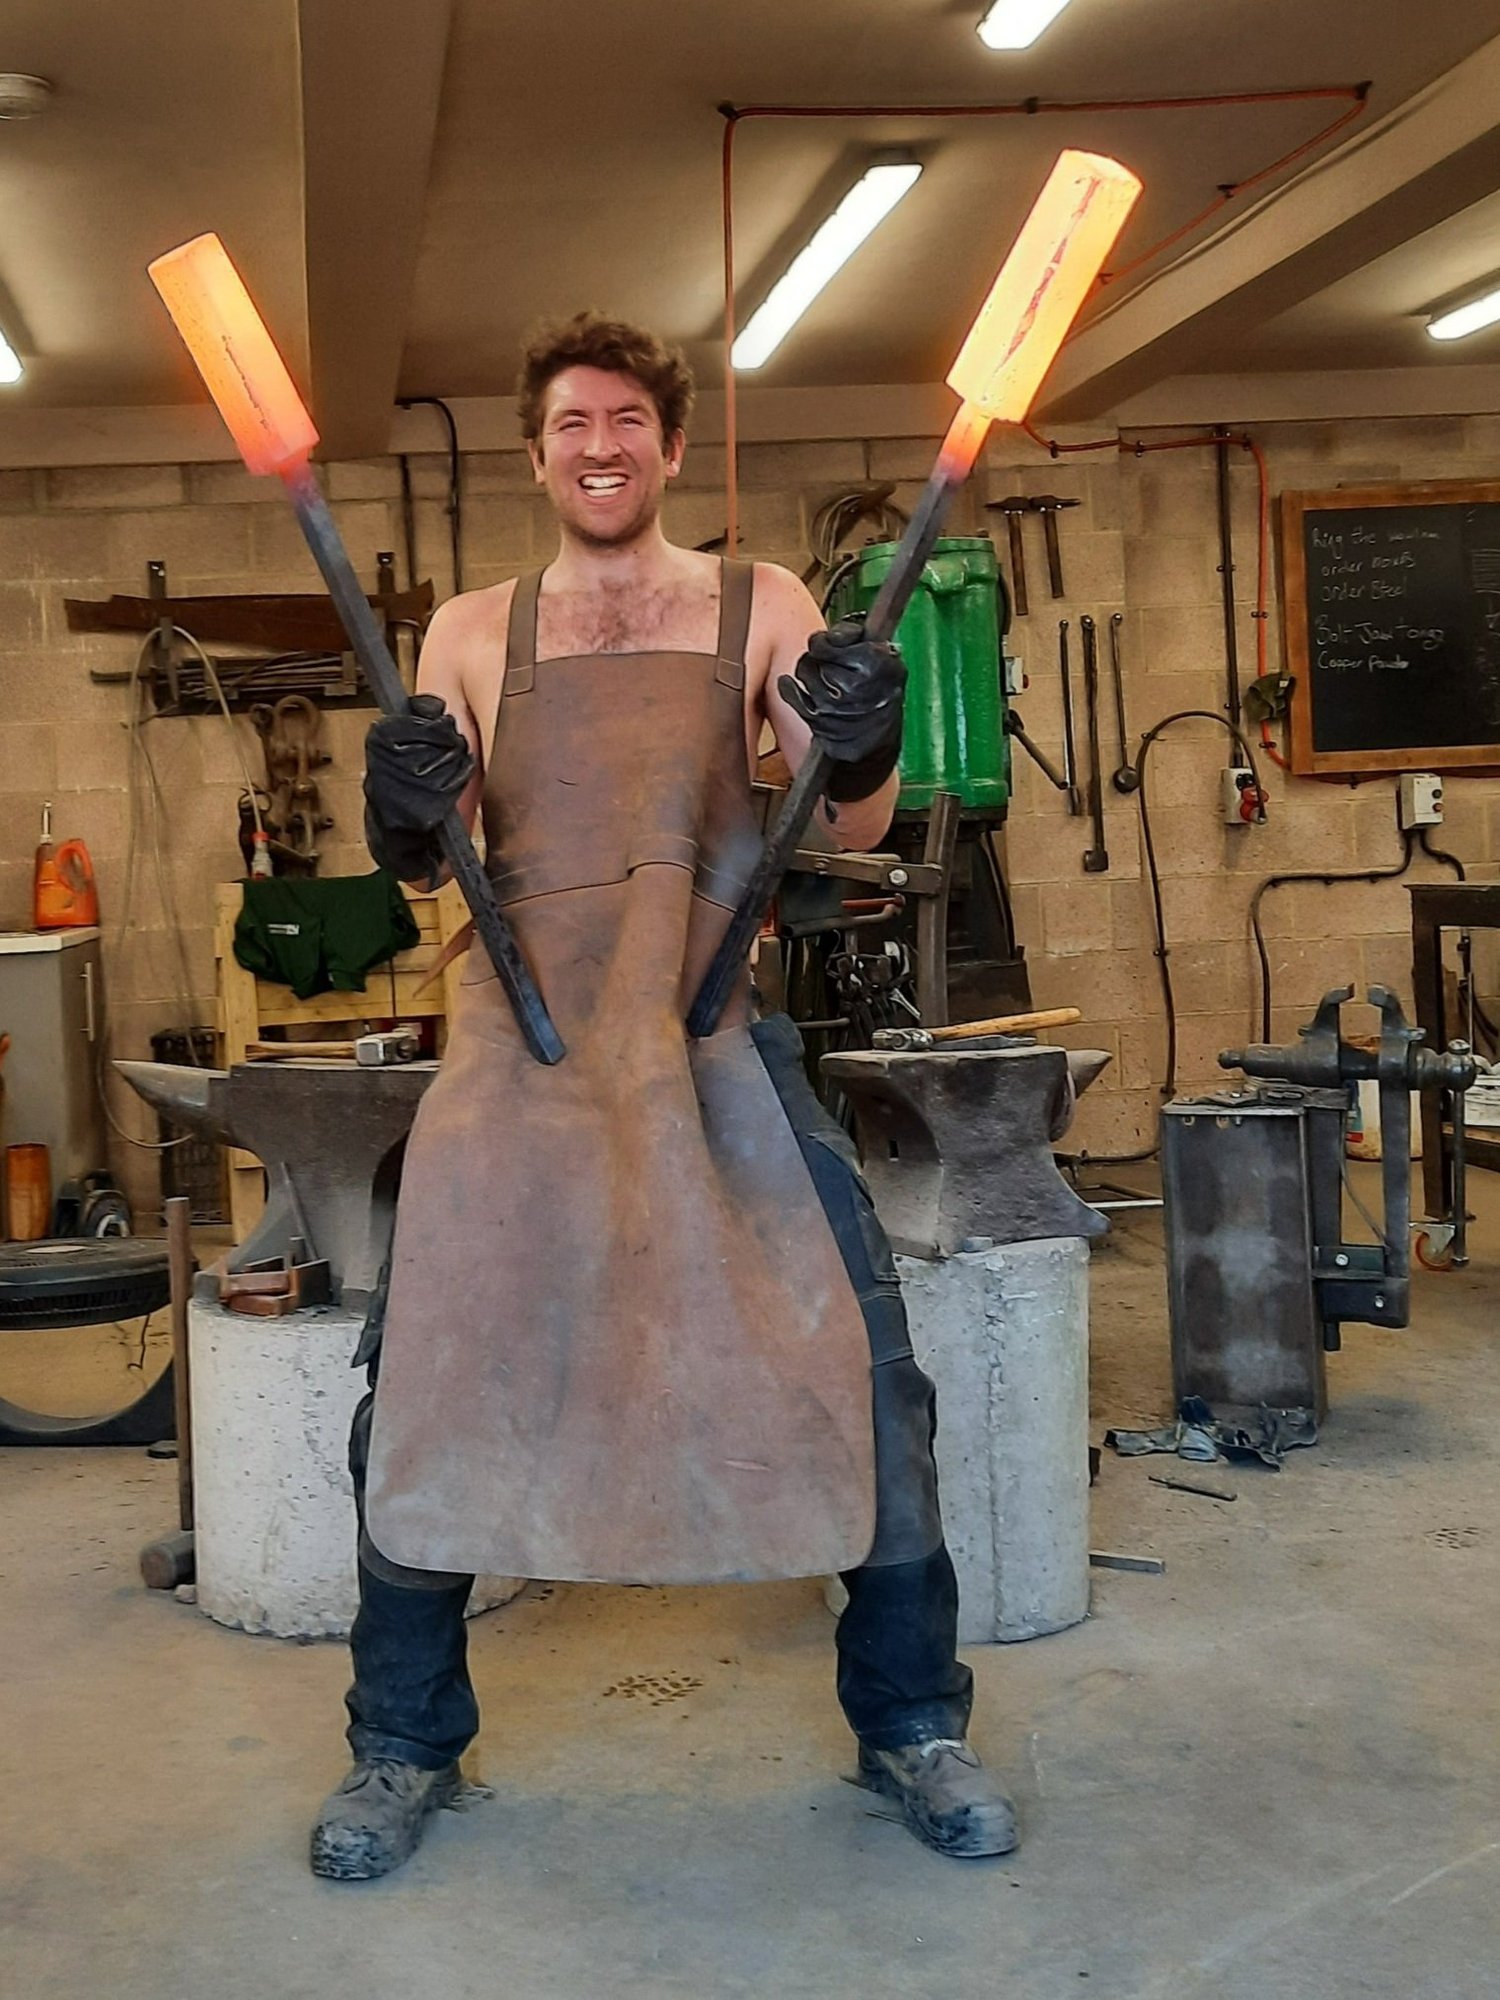
I use three basic types of construction, with variations on each. All three have their advantages, and the right one often comes down to personal preference.
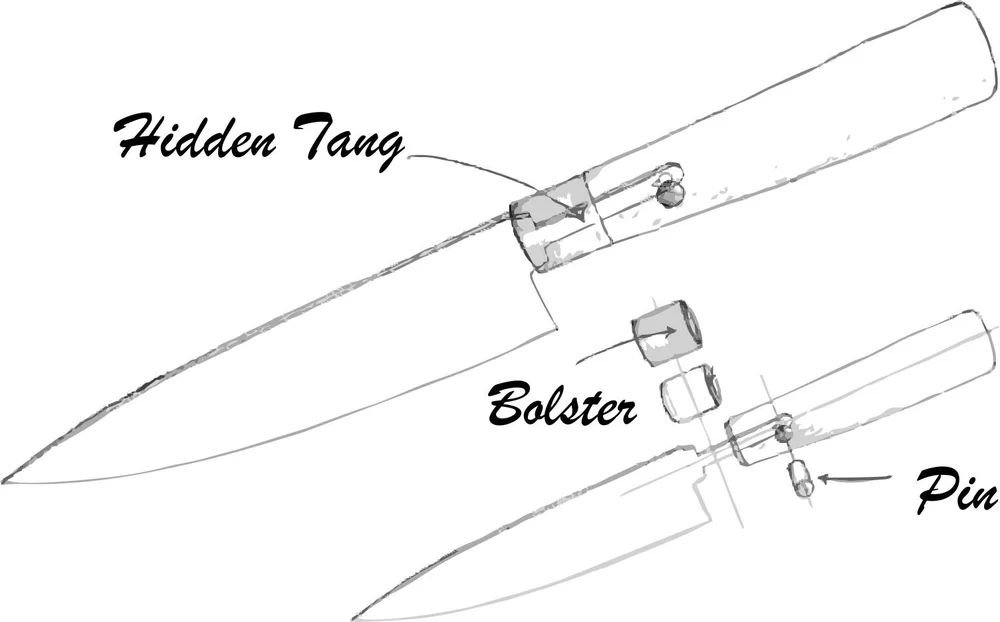
Hidden tang
Often used on Japanese knives and favoured for its lightness, which gives a well-balanced knife that feels nimble and quick in the hand. It also shows off a nice piece of wood for the handle. I usually run the tang all the way through, thread the end and secure it with a Corby bolt, so the handle is mechanically connected to the blade.
Best for: gyutos, santokus, nakiris and pettys.
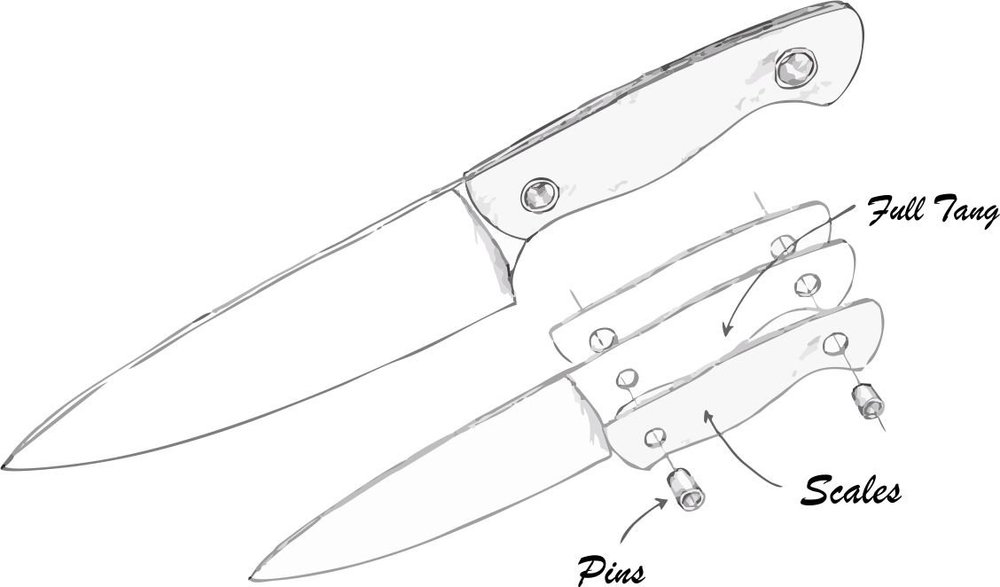
Full tang
The most common style in the western canon. It offers durability, a good heft and simplicity of construction. I favour it for most of my mono-stainless knives, as it's the most cost-effective way to build a knife that will last a lifetime while still giving you the performance of a more expensive blade.
Best for: most blade designs, which is why it's so popular.
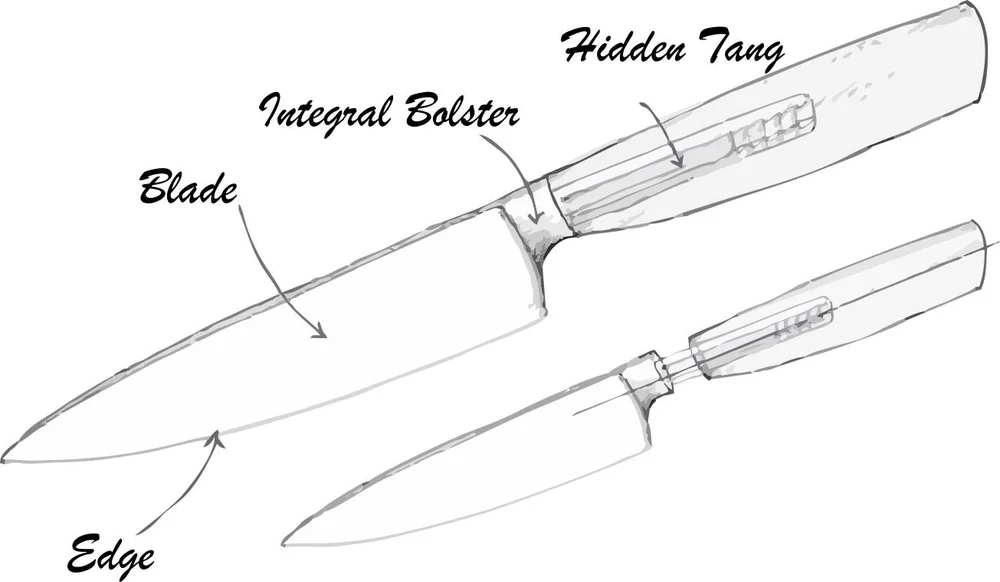
Integral bolster
My personal favourite. The blade material flows seamlessly into the handle, which makes it comfortable in the hand, with the weight centred for lovely balance. I think it shows the most skill, especially in Damascus, where the pattern flows up into the handle. It's among the most expensive knives I make, because of the extra material and the time spent grinding and polishing the transitions.
Best for: classic chef's knives, big gyutos and hunting knives.
Handle woods
Every handle is stabilised, shaped and polished by hand. Swipe or scroll through the woods I use most. Each block is different, so yours will have its own character.
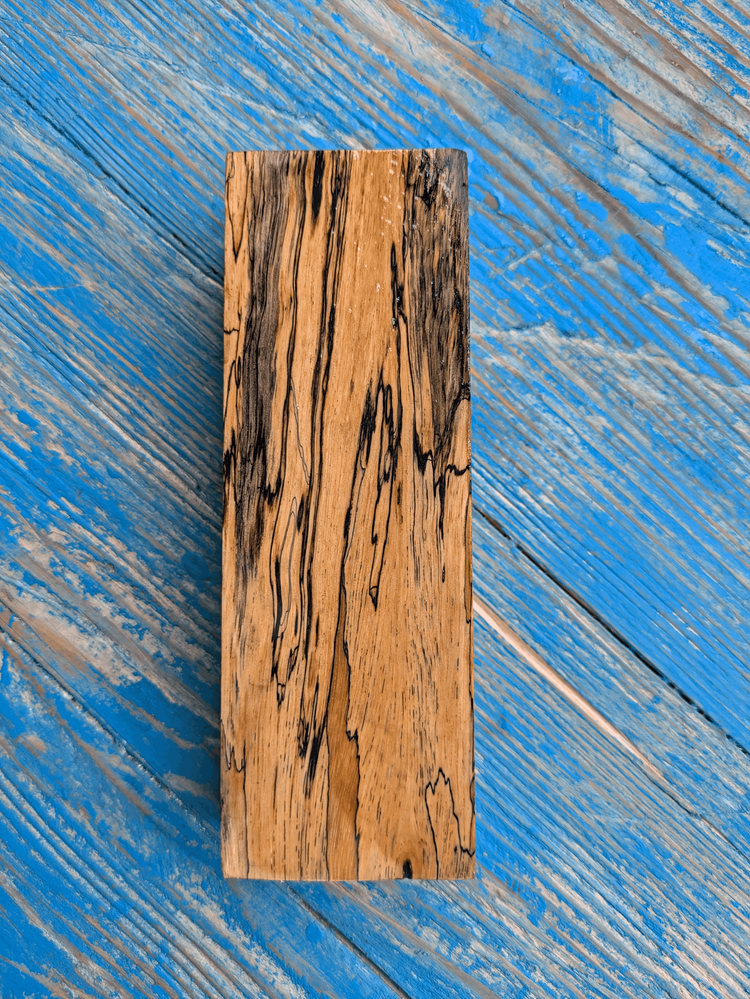
Spalted Tamarind
One of my personal favourites for a handle. The tree that gives us the tamarind paste in Asian cooking also produces this gorgeous light-coloured wood. The spalting comes from fungal colonisation, which the stabilisation process I use stops in its tracks.
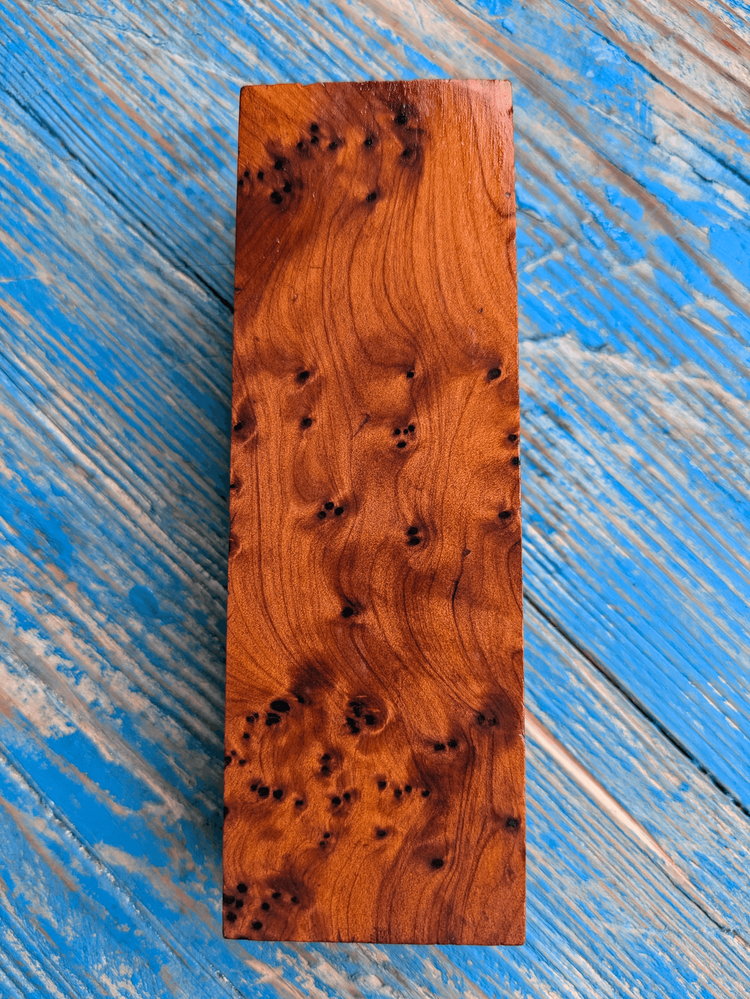
Thuya Burl
Thuya burl from the Atlas mountains. This highly sought-after wood, with its rich, deep colour, was once used in votive offerings to the gods by the ancient Greeks and Romans. It even has a lovely citrus-like aroma.
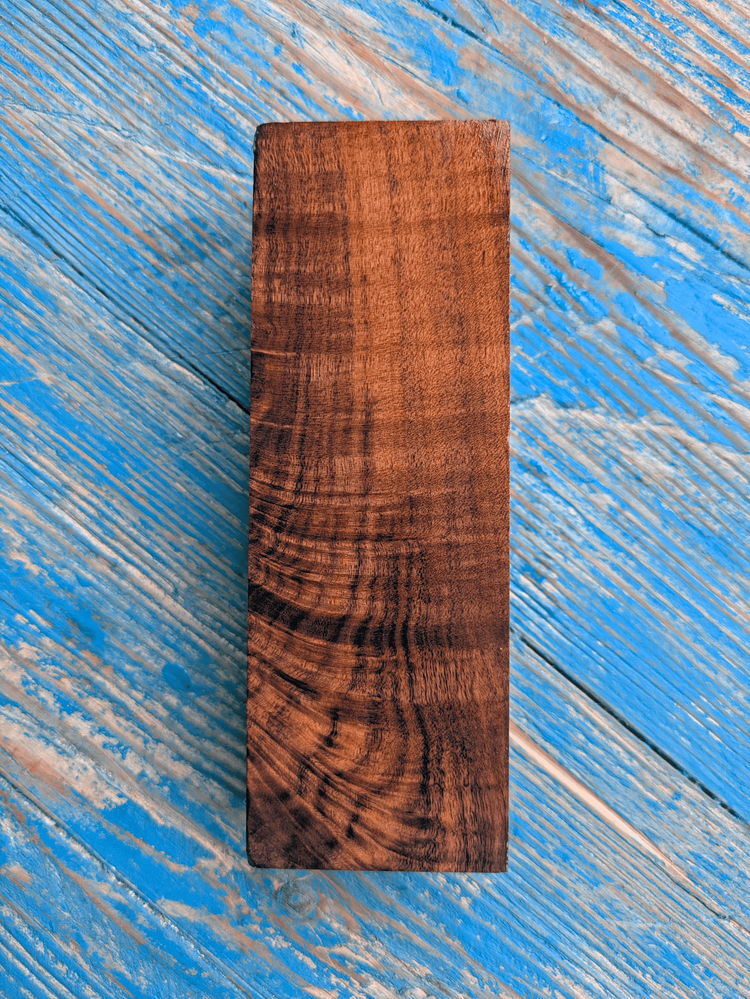
Ringed Gidgee
A super hard, curly wood from Australia with a rich reddish colour and lovely little micro curls.
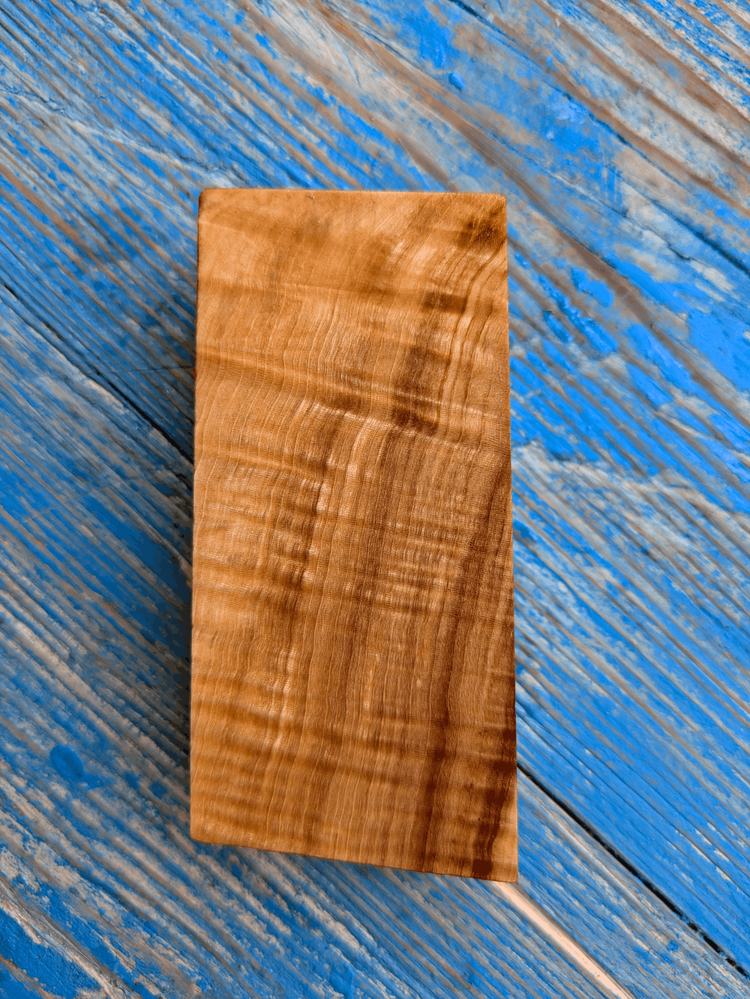
Curly English Chestnut
From the humble chestnut tree, this wood has so much curl it looks almost holographic in the light. That's very difficult to pick up in a photograph, but this light wood really glows when it's highly polished.
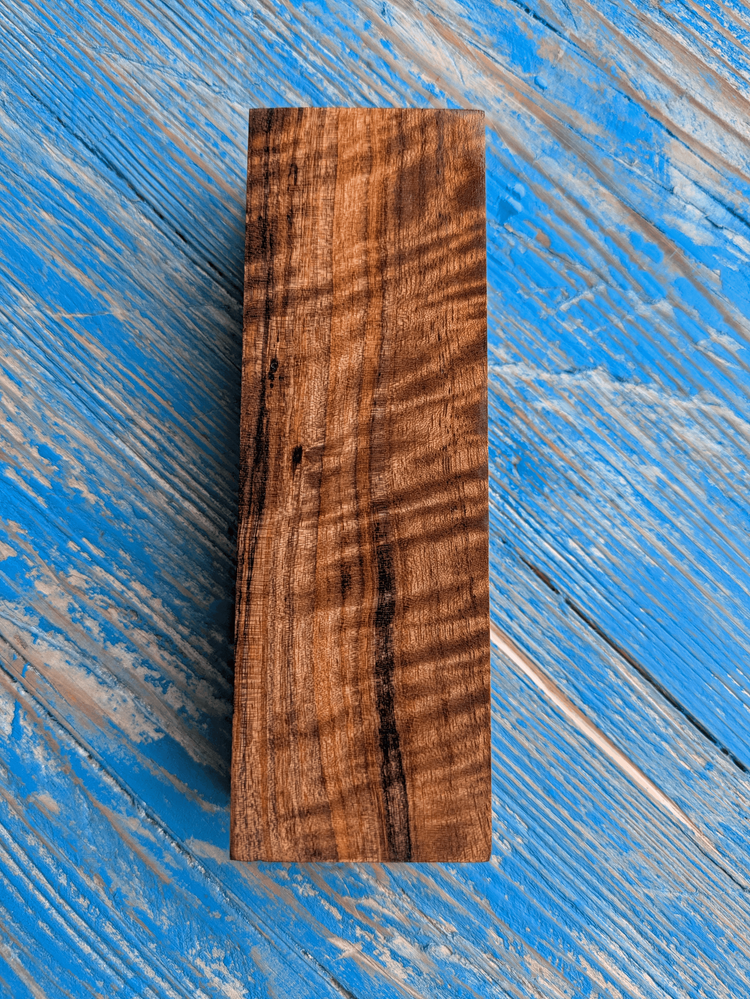
Curly Mango
Delicious fruit and delectable wood come from this tree. This species of mango from Indonesia has a darker wood with some beautiful curl, which turns holographic in the right light.
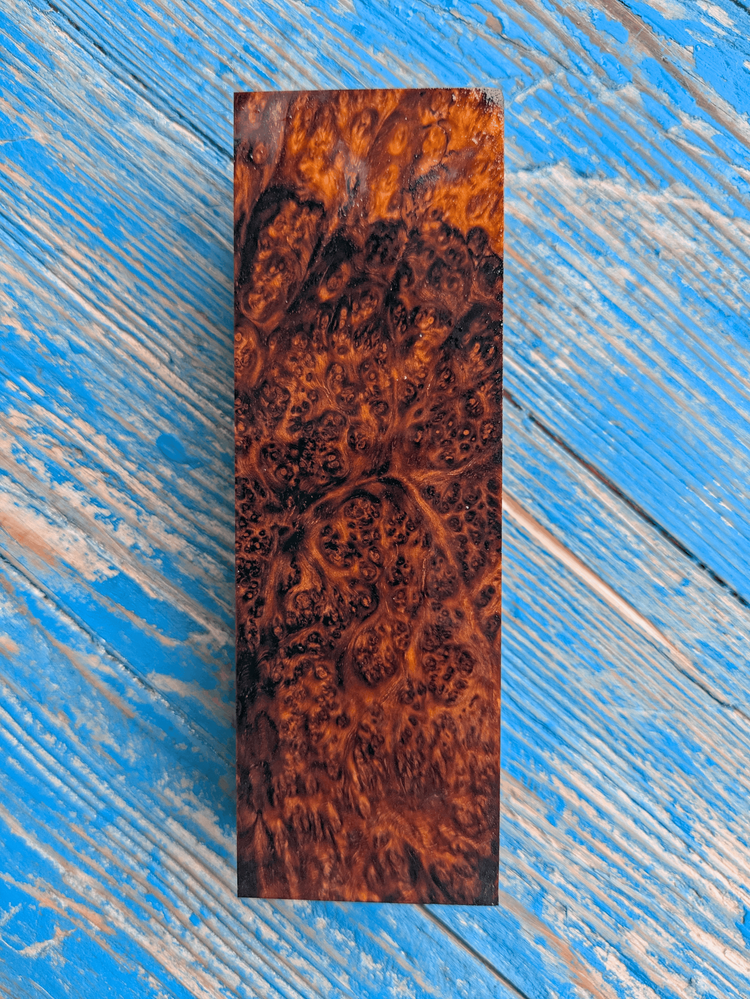
Amboyna
My personal favourite burl. Amboyna is the burl wood of the Narra tree, with a super deep red heartwood and a glowing, yellowish-white sapwood. Highly sought after by makers of all types.
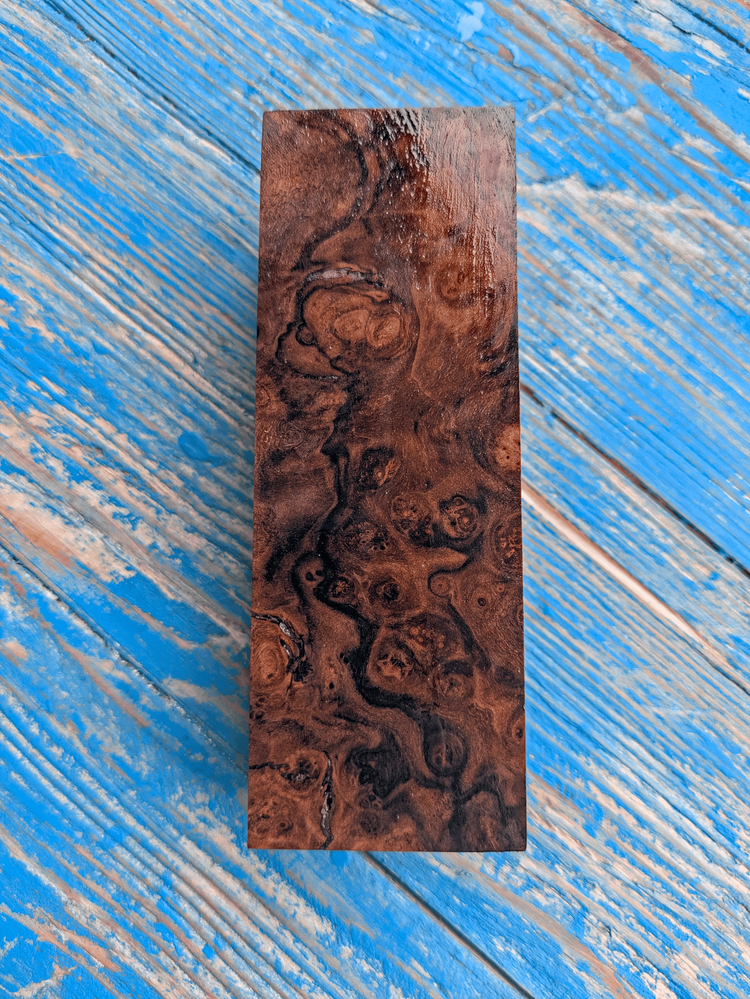
Turkish Walnut Burl
Walnut has always been a top-tier wood for makers, and this burl from Turkey is often used by gunsmiths for the stocks of premium shotguns. Super dark with lots of activity, and it takes a high polish. What more could you want?
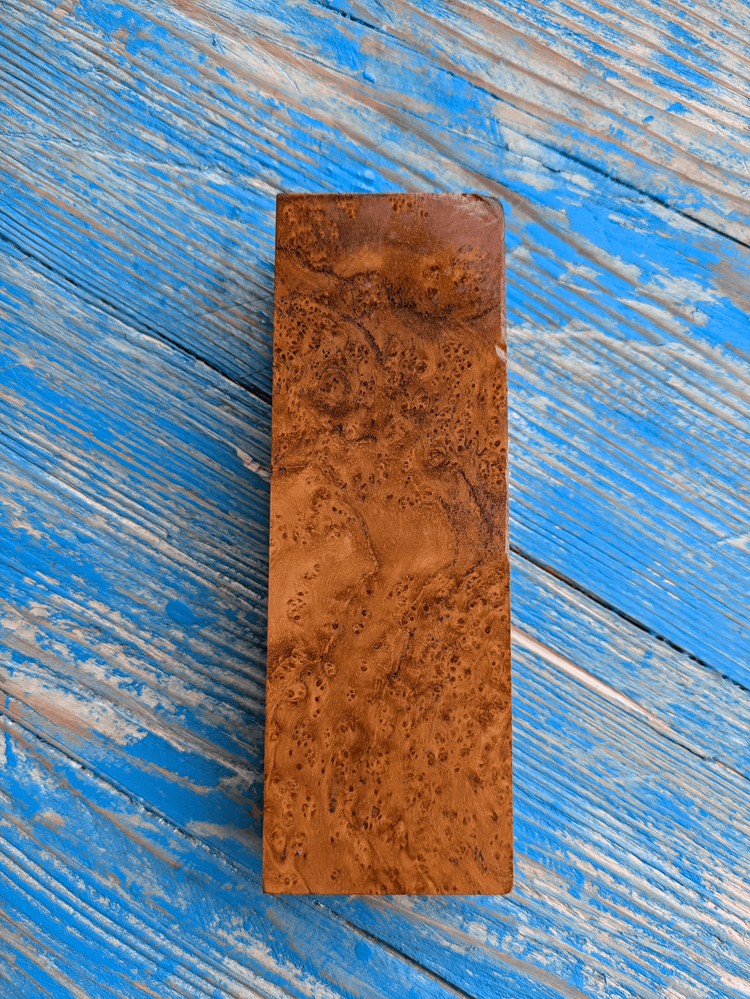
Teak Burl
Teak is native to south and south-east Asia and has always been prized for its strength, water resistance and natural oiliness, all of which make great handle material. This burl is beautiful on top of that, and the colours can vary a lot, with the occasional green and blue in some of the pieces I've used.
Not seen the one you want? I source other woods too, so just ask when you send your enquiry.
Start your enquirySteel
There are lots of excellent knife steels these days. Here are my favourites, starting with the big question.
Stainless or high carbon?
Carbon and stainless steel share the same basic ingredients of iron and carbon. The main difference is alloy content: stainless must contain at least 10.5% chromium.
Corrosion
Stainless resists rust and staining from acids. Carbon steel will rust if left wet, but with proper care it forms a protective patina that adds to the knife's character.
Edge retention
Stainless generally holds an edge for longer, but it's harder to sharpen, because chromium carbides are harder than iron carbides.
This is only an overview, and there are plenty of exceptions. For a deeper dive, I'd recommend Dr Larrin Thomas's book, Knife Engineering: Steel, Heat Treating, and Geometry.
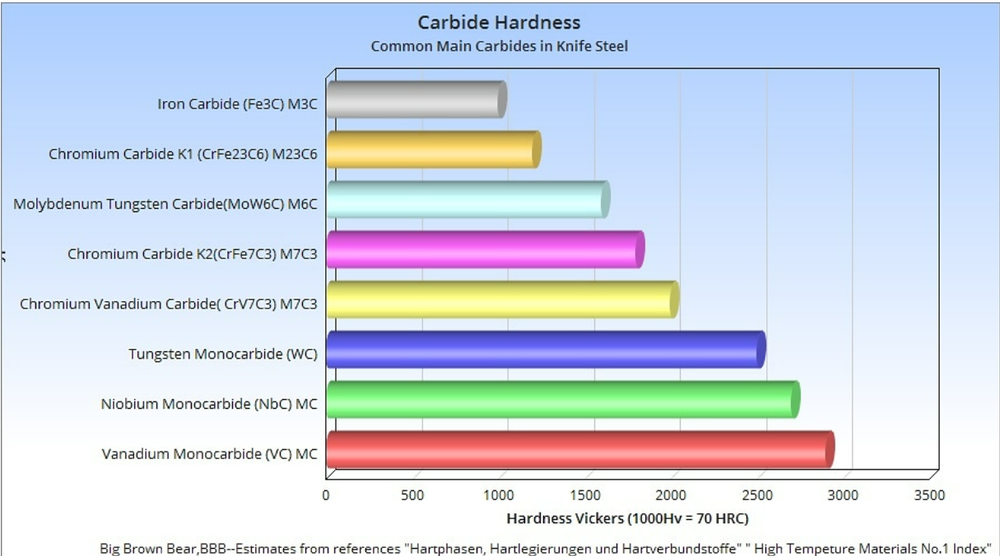
Hardness of the main carbides found in knife steels.
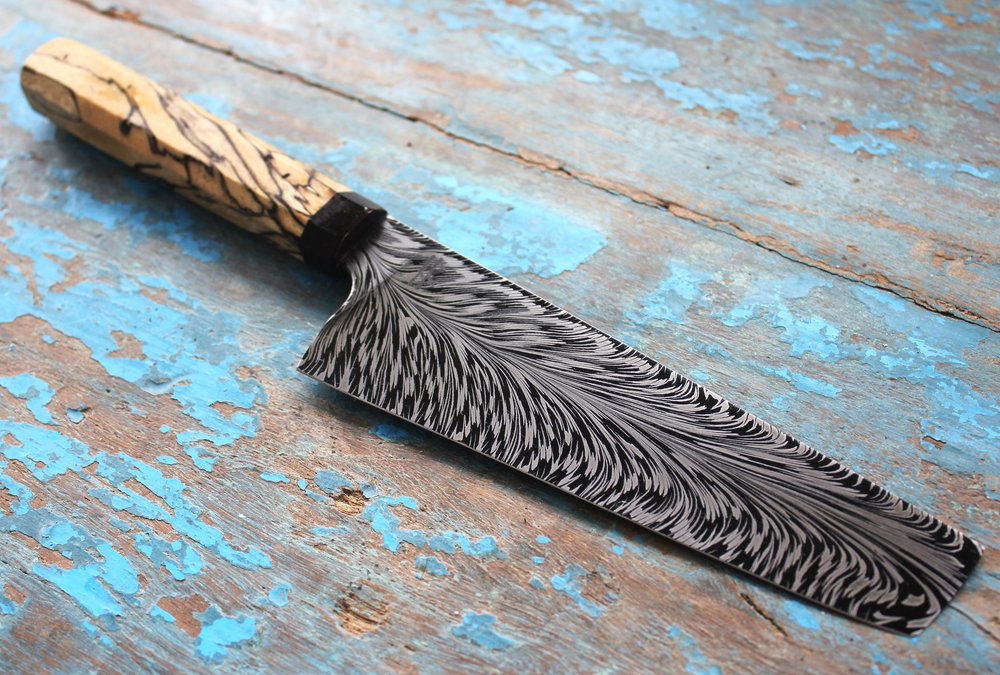
Damascus steel
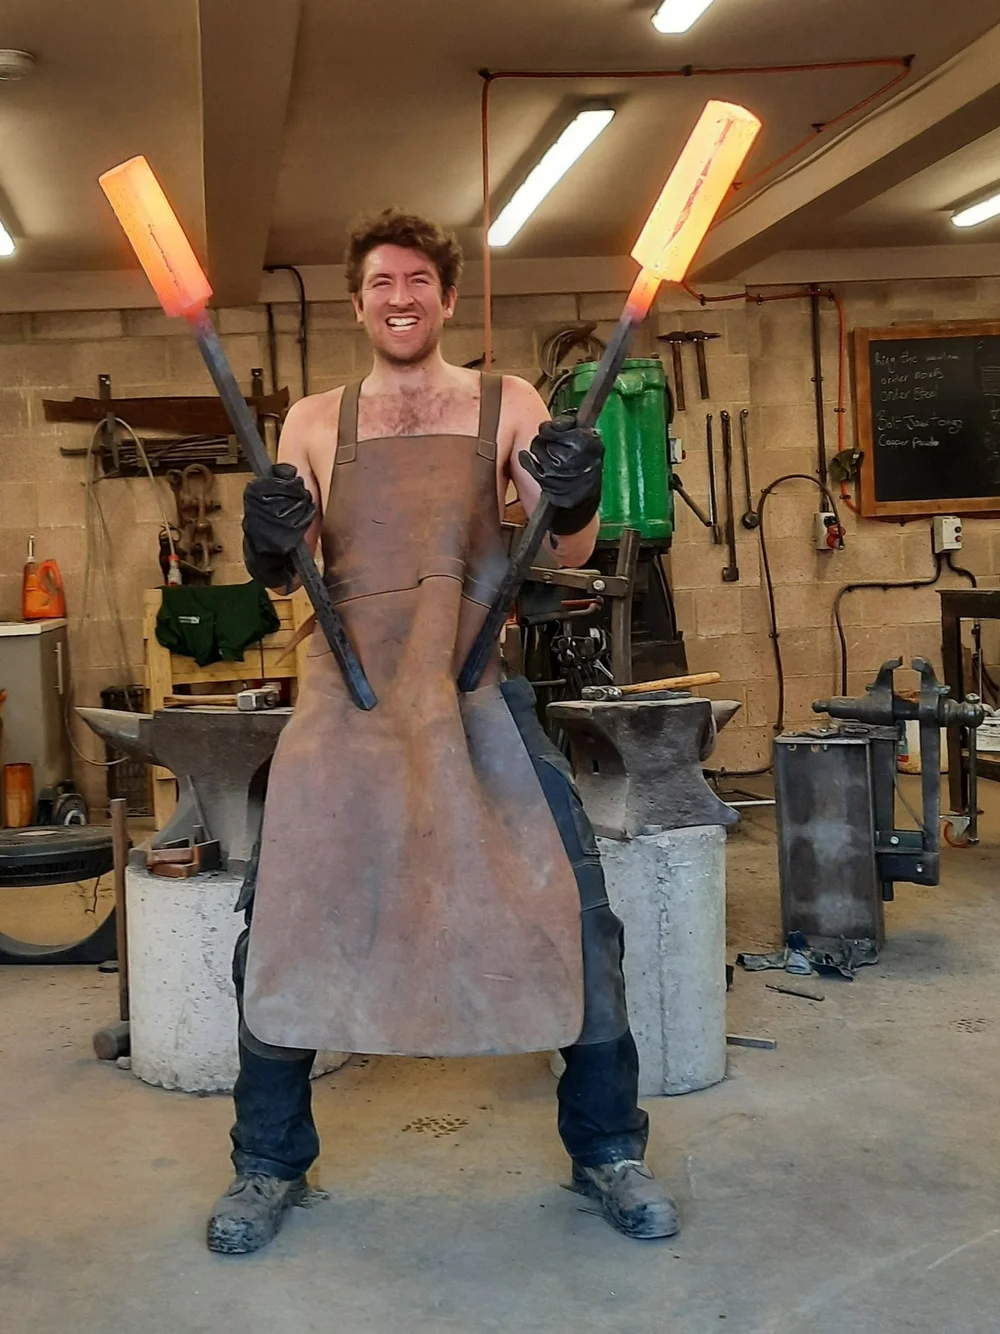
Most people, me included, make Damascus (or pattern-welded steel, if you're being pedantic) from two steels: 1095, a plain carbon steel with 0.95% carbon, and 15N20, which contains nickel.
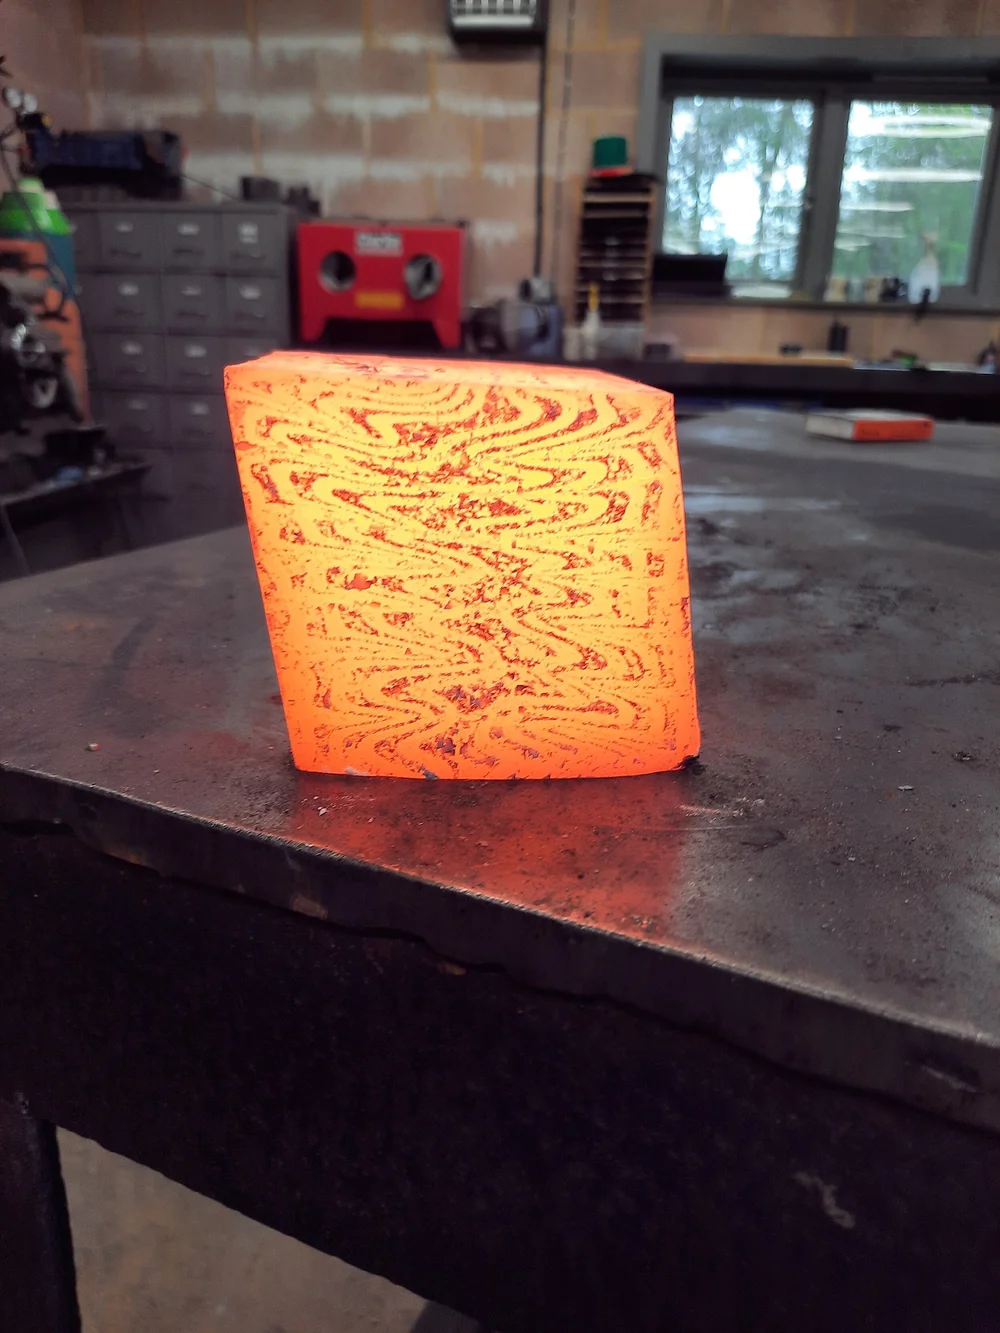
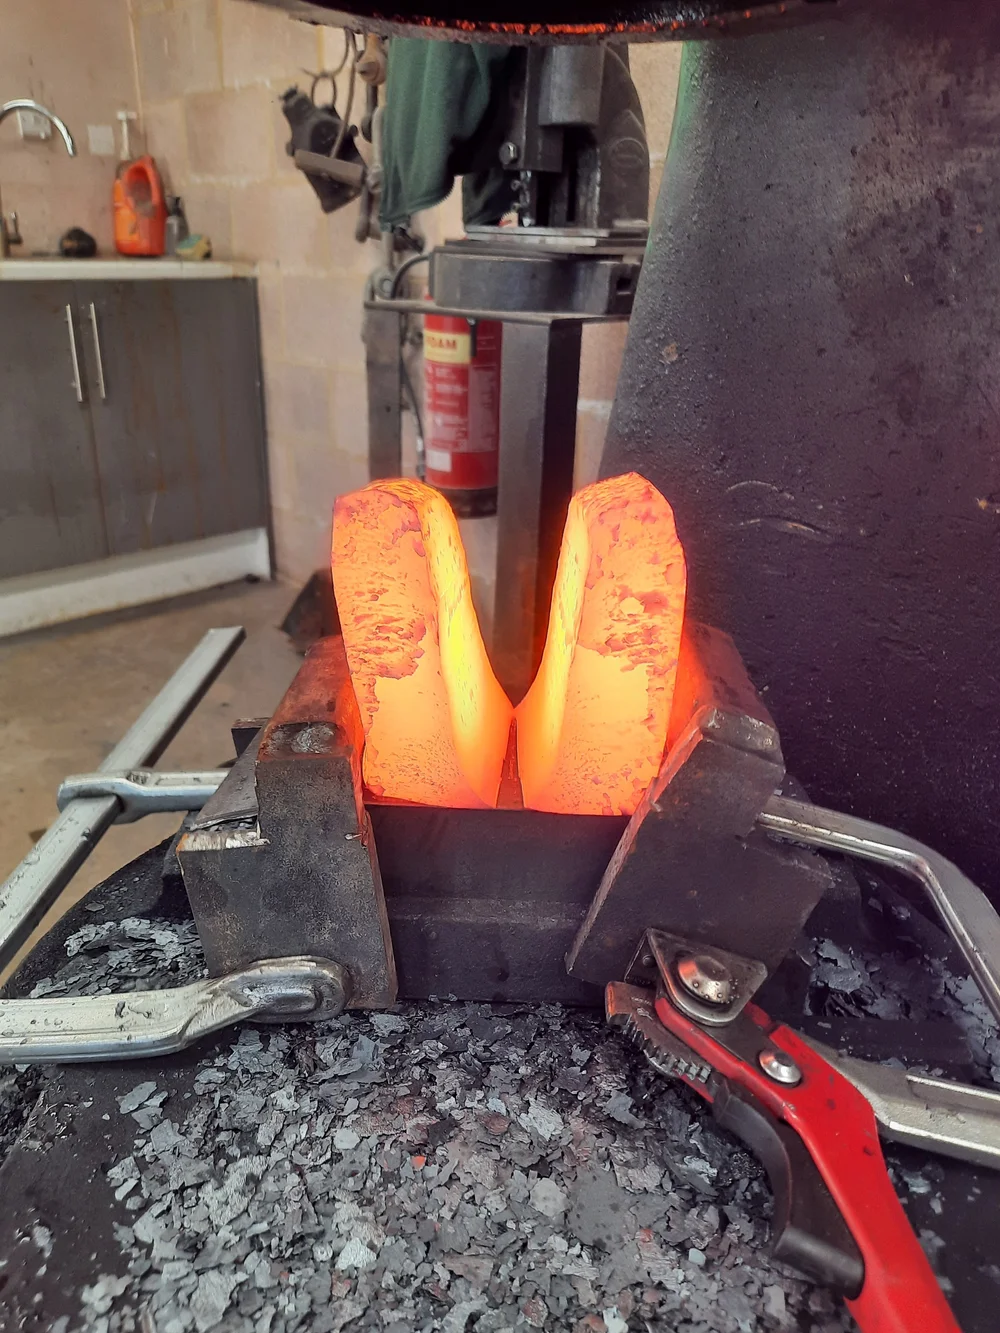
I stack them, forge-weld them together, then twist and layer them in different ways to create a pattern in the blade. Once the blade is ground and polished, it's submerged in acid. The nickel in the 15N20 resists the acid more than the plain 1095, which reveals the layers.
Is Damascus better than the sum of its parts? In short, no. It's done for looks and to showcase skill and craftsmanship. My favourite is the feather pattern. Not many people make it, and it gives a really unique, beautiful blade.
Stainless steels
My newest favourites, and the ones that perform best in a working kitchen.
Stainless Damascus
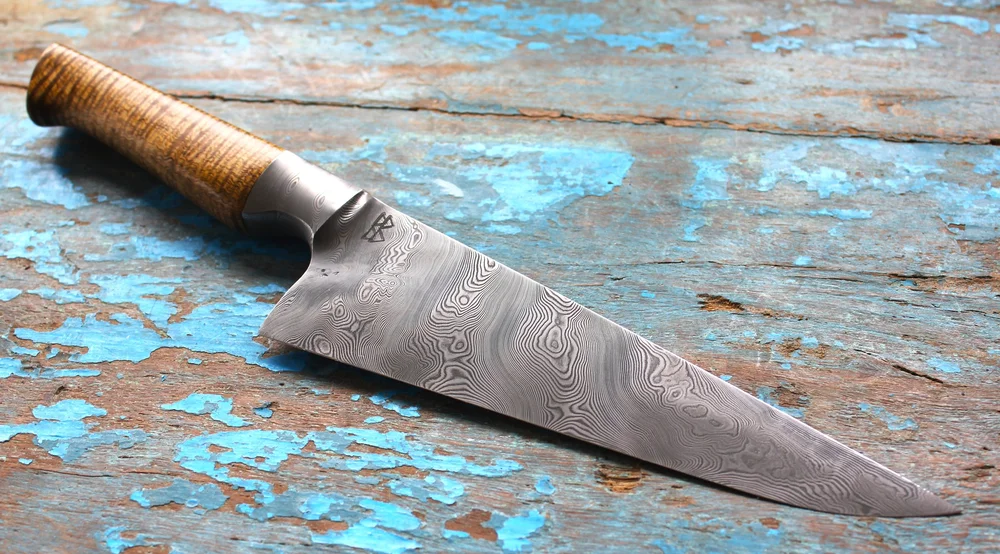
This is a very specialist material and only a few companies make it. I use two: Damasteel, made in Sweden, and Takefu Coreless, made in Japan. Both use extremely good steels and are the best performing I've come across.
Damasteel comes in a whole range of patterns and is widely considered the best knifemaking steel out there, though that comes down to preference. Takefu comes as a bar of layered but unpatterned steel, which I pattern myself from bar stock.
They aren't cheap, and they're harder to work with than carbon steel, in both forging and finishing, so I charge a premium for blades in these steels.
Mono-stainless (AEB-L)
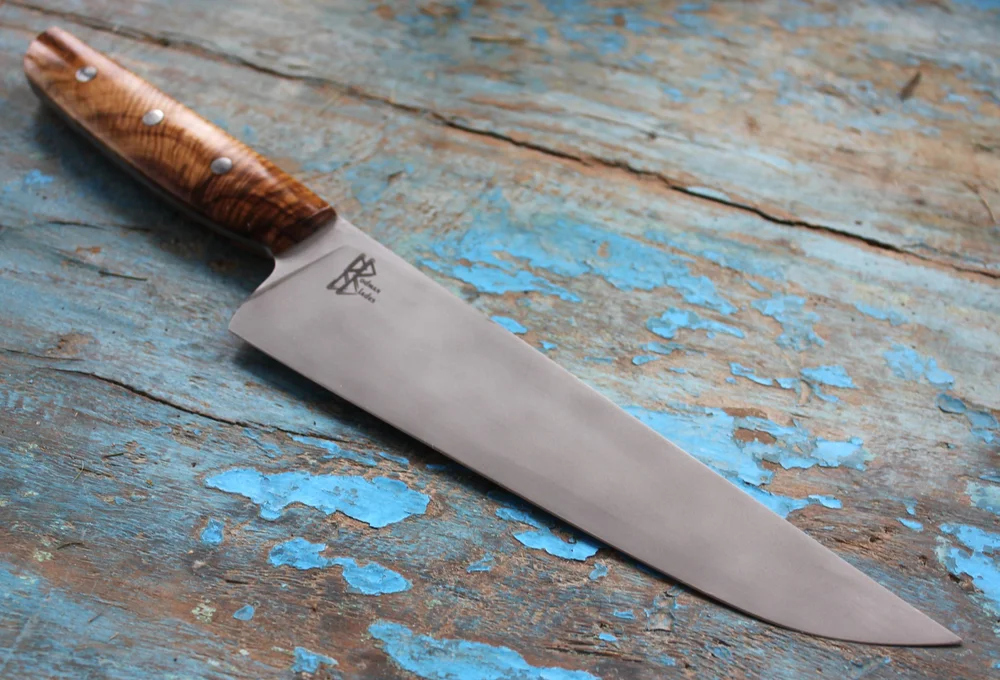
For practical, everyday use, you can't beat a mono-stainless steel. It gets a bad reputation mainly from mass-produced knives that are poorly heat treated, use the wrong steel to save money, or have bad geometry.
In my opinion, the best knife steels out there today are stainless. For my stainless range I use AEB-L, which is widely used by knifemakers for its high hardness, exceptional toughness, great edge retention and good corrosion resistance.
Geometry
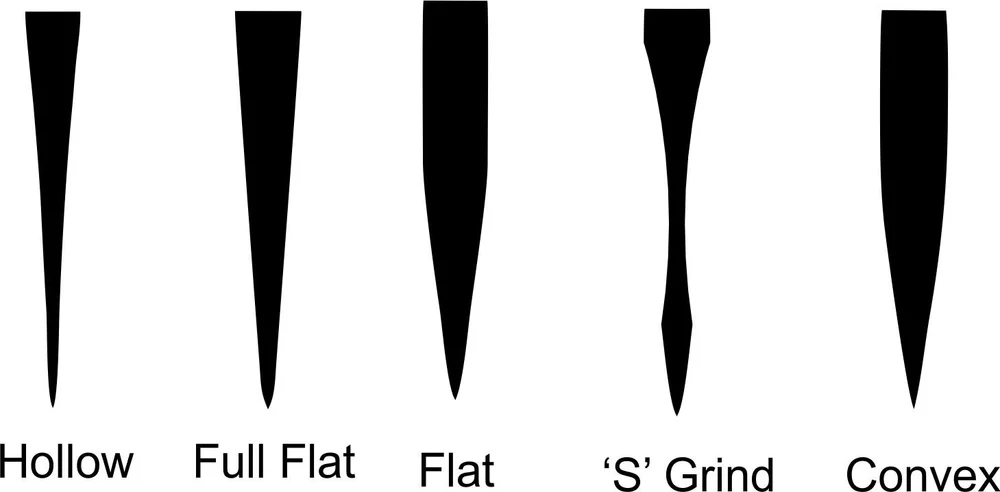
Geometry is how the blade is ground. It directly affects how the knife performs for different tasks, as well as its strength and weight. Here are the grinds I'll talk you through.
Full flat
My favourite. Thickest at the spine for strength, tapering to a thin edge for excellent slicing. It's stronger than a hollow grind and cuts better than a flat grind. Food can stick to the blade, but in 13 years in professional kitchens that's never bothered me or the chefs I've worked with. I also do a double flat grind, with a thicker flat grind and a higher secondary bevel, which gives a thinner edge and breaks the vacuum.
Flat
Often found on Japanese blades or those with a brut de forge finish, and also known as a sabre grind. The bevel runs flat from the edge, but not all the way to the spine. It's very robust with good cutting ability, though you can't grind it as thin at the edge as a full flat.
Convex
Similar to a flat grind, but ground on a convex arc. The edge is well supported and robust, and food releases well. It tends to be used on larger knives, such as cleavers and big chef's knives.
Hollow
Made by applying the blade to a grinding wheel, which takes a concave scoop out of it. It leaves the edge too thin for most culinary knives, so it's prone to chipping or bending, and it wedges vegetables apart rather than cutting them. It suits hunting and skinning knives better.
'S' grind
Combines a full flat, flat or convex grind with a hollow in the middle of the blade, to help food release. The knifemaking community is still divided. I like it on a nakiri or small santoku, but not on a chef's knife or gyuto, where it feels too light. A heavier blade makes light work of a big butternut squash or celeriac.
Start your custom knife
Tell me what you have in mind and I'll come back to you personally, usually within a couple of days. Not sure on the details? That's fine, just tell me how you'll use it.
A few definitions
Terms you'll hear me use when we talk through your knife.
- Concave
- Shapes that curve inward, like a crater. Think of the word cavity.
- Convex
- Shapes that curve outward, like a rugby ball.
- Spine
- The back of the blade, opposite the edge.
- Primary bevel / grind
- Where the knife first begins to narrow into a cutting edge from the thickness of the main stock.
- Secondary bevel
- The edge of the blade.
- Distal taper
- The blade should be thickest at the spine near the handle and taper to the thinnest point at the tip, for better weight distribution and strength.